How to Install a Dash Cam in Your Car: A Simple Step-by-Step Guide
How to Install a Dash Cam in Your Car: A Simple Step-by-Step Guide
By the Exquisite Deals Team — the Exquisite Deals curation team hand-reviews every product it lists, comparing specs, value, and real buyer questions before recommending anything.
Quick Answer
To install a dash cam, mount it behind the rearview mirror, run the power cable along the headliner and down the A-pillar to the 12V socket or fuse box, tuck the wire out of sight, then set the date, time, and loop recording. Most plug-in dash cams take about 20 to 30 minutes to install yourself.
Featured Product

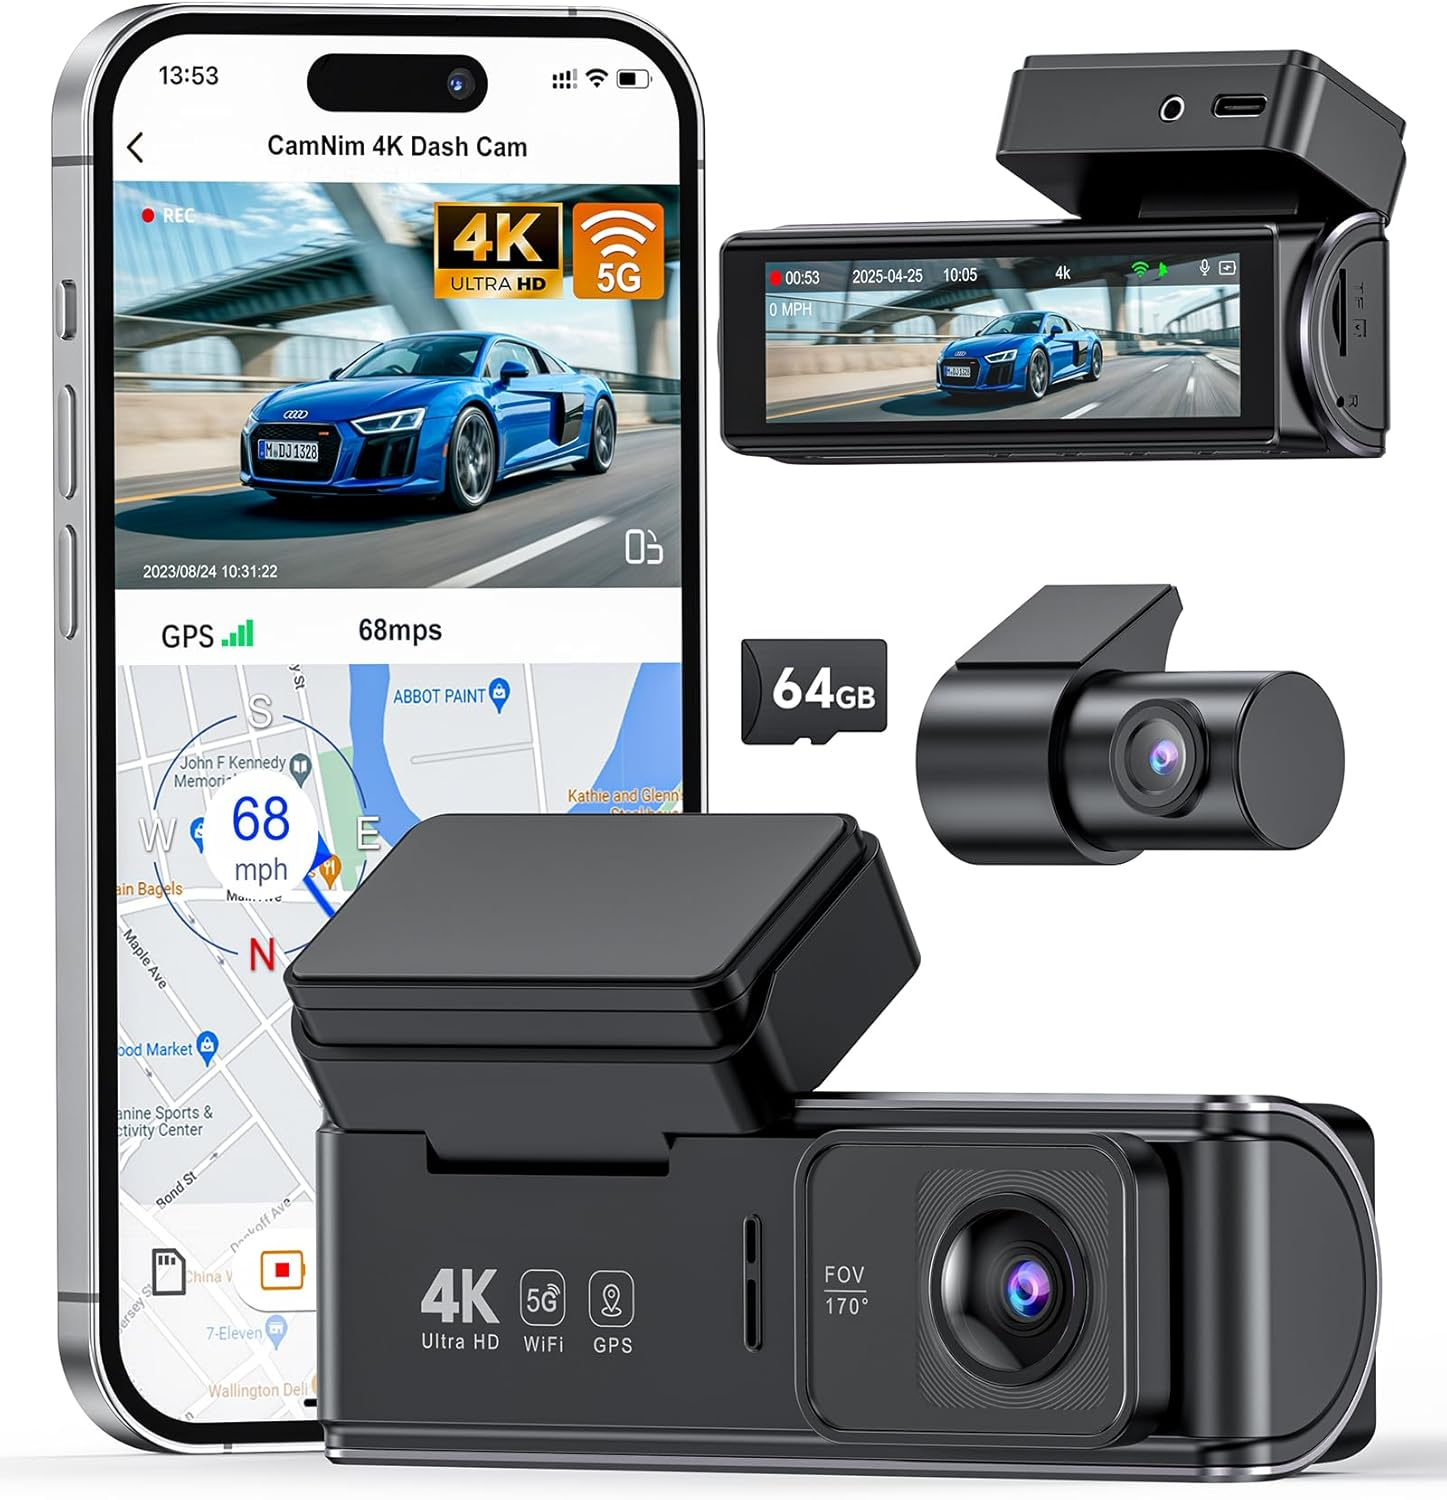
4K Dual Dash Cam Front and Rear — a WiFi GPS dashcam with night vision, wide-angle coverage, and 24-hour parking mode for front-and-rear protection. Shop now →
Why Install a Dash Cam
A dash cam is one of the simplest upgrades you can add to a car, and it pays off the moment you need it. It records the road ahead — and behind, with a dual model — so you have clear video evidence in a crash, a dispute, or a hit-and-run. Many drivers find it lowers stress on the road and can even help with insurance claims. The good news is you do not need a mechanic: with a few minutes and no special tools, you can install most dash cams yourself. This guide walks you through it step by step.
Installing it well matters as much as buying a good one. A tidy install keeps the camera's view clear, hides the wire so it looks factory-fitted, and makes sure the camera powers on and records every time you drive. Follow the steps below and you will get a clean, reliable result.
What You Need Before You Start
- Your dash cam and its mount (suction or adhesive), plus the rear camera if it is a dual system.
- The power cable and 12V car adapter that came with it.
- A memory card of the recommended type and size, if one is not included.
- A plastic trim tool or a credit card to tuck the cable into panels.
- Glass cleaner and a cloth for a clean, strong mount.
- Optional: a hardwire kit if you want parking mode without using the 12V socket.
Have everything within reach before you begin, and read your camera's quick-start card so you know its specific connectors.
Step-by-Step: Installing Your Dash Cam
Step 1: Pick the mounting spot
Choose a spot behind the rearview mirror, high on the windshield. This gives a clear, centered view of the road and keeps the camera out of your line of sight. Make sure it sits within the area your wipers clean so the view stays clear in rain.
Step 2: Clean the glass and mount the camera
Wipe the windshield where the mount will sit and let it dry. Press on the suction or adhesive mount firmly, then attach the camera. Aim the lens straight ahead and slightly down so the road fills most of the frame.
Step 3: Route the power cable
Tuck the cable up into the headliner beside the camera, run it across to the passenger side, and down the A-pillar (the trim beside the windshield). Use your trim tool or a card to press the wire into the gaps so it disappears. Keep clear of any airbag areas noted in your car's manual.
Step 4: Connect the power
Continue the cable down and along the trim to your 12V socket and plug it in. For a cleaner look and parking mode, a hardwire kit connects to the fuse box instead — if you are not comfortable with that, the 12V socket works perfectly.
Step 5: Add the rear camera (dual systems)
If you have a front-and-rear kit, mount the rear camera high on the back windshield and run its cable along the headliner to the front unit, tucking it into the trim the same way.
Step 6: Insert the card and set it up
Put in the memory card, start the car, and set the date, time, and resolution. Turn on loop recording so the camera overwrites the oldest clips, and enable parking mode if your setup supports it. Take a short test drive and check the footage.
Common Mistakes to Avoid
Blocking your view. Mount the camera behind the mirror, not in the middle of your sightline. It should be easy to forget it is there.
Leaving the wire loose. A dangling cable looks messy and can be distracting. Tuck it fully into the headliner and trim for a factory look.
Skipping the card format. Format the memory card in the camera before first use so recordings save reliably. Use a card that meets the camera's speed and size specs.
Ignoring airbags. Route the cable around, not through, airbag areas in the pillars. Check your owner's manual if you are unsure.
Care and Maintenance Tips
A little upkeep keeps your dash cam reliable for years. Wipe the lens now and then so smudges do not blur your footage, and keep the windshield clean where the camera looks out. Every month or two, check that the mount is still firm and the camera is aimed correctly, since heat and bumps can loosen it. Format the memory card periodically to keep recording smooth, and back up any important clips before you do. In very hot climates, an adhesive mount often holds better than suction, which can slip in high heat. If your camera has firmware updates, install them for the latest features and fixes. These small habits make sure the camera is always ready when you need it most.
A Practical Example: A Clean 30-Minute Install
Imagine a Saturday morning install. You clean the glass behind the mirror, press on the mount, and clip in the camera. You tuck the cable up into the headliner, across and down the passenger A-pillar, and along the trim to the 12V socket. For your dual kit, you add the rear camera on the back glass and hide its wire along the roofline. You slot in the memory card, set the time, switch on loop recording and parking mode, and take a quick drive around the block. The footage is crisp, the wires are invisible, and the whole job took about half an hour with no tools beyond a plastic trim card. That is a typical, satisfying dash cam install.
Getting the Best Footage From Your Dash Cam
A few simple settings turn a good dash cam into a genuinely useful one. Choose the highest resolution your card and camera comfortably support so license plates and signs stay readable, then confirm the frame rate is smooth. Aim the lens so the horizon sits roughly a third of the way down the frame, giving you plenty of road without wasting view on the sky or the hood. Turn on the date, time, and GPS stamp if available, since that data strengthens any insurance or dispute claim. Enable loop recording so the camera never fills up, and set the g-sensor sensitivity so real bumps lock important clips without flagging every pothole. If you park in risky spots, switch on parking mode and consider a hardwire kit with battery protection. Finally, review your footage now and then to make sure the exposure and angle still look right. Dialed in this way, your dash cam captures clear, dependable evidence every single drive.
Frequently Asked Questions
Can I install a dash cam myself?
Yes. Most plug-in dash cams install in about 20 to 30 minutes with no tools beyond a plastic trim card. Mount it, route the cable, plug it in, and set it up.
Where should I mount a dash cam?
Behind the rearview mirror, high on the windshield and within the wiper-cleaned area. This gives a clear, centered view and keeps the camera out of your sightline.
Should I use the 12V socket or hardwire it?
The 12V socket is easiest and works great. Hardwiring to the fuse box gives a cleaner look and enables parking mode, but only do it if you are comfortable with basic wiring.
What memory card do I need?
Use the card type, speed, and size the camera recommends, and format it in the camera before use. A high-endurance card is best for continuous recording.
Will a dash cam drain my battery?
Plugged into the 12V socket, it only runs while the car is on. Parking mode uses a small amount of power, so a hardwire kit with cutoff protection is best for long parked periods.
Do I need a front and rear dash cam?
A front camera covers most needs, but a dual front-and-rear system adds protection from behind, which is useful for rear-end collisions and full coverage.
Key Takeaways
- Mount the dash cam behind the rearview mirror for a clear, unobtrusive view.
- Route the power cable through the headliner and A-pillar, then to the 12V socket or fuse box.
- Insert and format the card, then set the time and turn on loop recording.
- Keep the lens clean and the mount firm for reliable footage.
- A dual 4K front-and-rear dash cam gives the most complete protection.
Related Resources
- How Do AI Translation Earbuds Work?
- Best Portable Washing Machines for Small Spaces
- Best Beginner Drones With a Camera
- 4K Dual Dash Cam Front and Rear
- Shop the full Auto collection
Ready to Protect Every Drive?
Ready to find the right fit? Explore Exquisite Deals' auto collection and shop the deal at exquisite-deals.shop. Add a dash cam and drive with a clear record behind you.